A week ago I posted about the wheel thrown pottery class I went to at La Mano Pottery from a groupon deal.
On this Easter Sunday morning, I’m back again for the original pottery class I signed up for. A hand building pottery workshop that I also bought a groupon deal for.
This time it was a much smaller class so our instructor started us off with a tour of the studio. She took us downstairs into the area where finished pottery work done via the pottery wheel or hand built are dried, fired in their kilns and then glazed. Some of the finished pieces are the work of students who’ve taken workshop classes, others like the ones you see with the white tags are done by professional artists. Showing various shapes & designs, the students drew ideas & inspiration on what to make.


We return to the class area and the instructor then begins to demonstrate how to cut & shape the clay, imprint designs, attach pieces together and seal any gaps. I came in with the idea of making a yarn bowl, then became concerned when the instructor said bowls were not very good to design with the flat clay because of the higher risk of the finished piece cracking while drying.
After speaking with the instructor about my concerns with making a yarn bowl, she suggested I do a cylindrical design as opposed to a bowl shape. (sigh of relief)

All pieces start out with a flat slab of clay. The clay is quite moist, a newspaper is required under the slab to prevent it sticking to the table surface. With a trimming instrument smooth away any uneven surfaces, then depending on what your desired piece is, you will then cut & shape your clay into whatever the final piece will be. Any design you want on the finished piece can be stenciled on at this time.

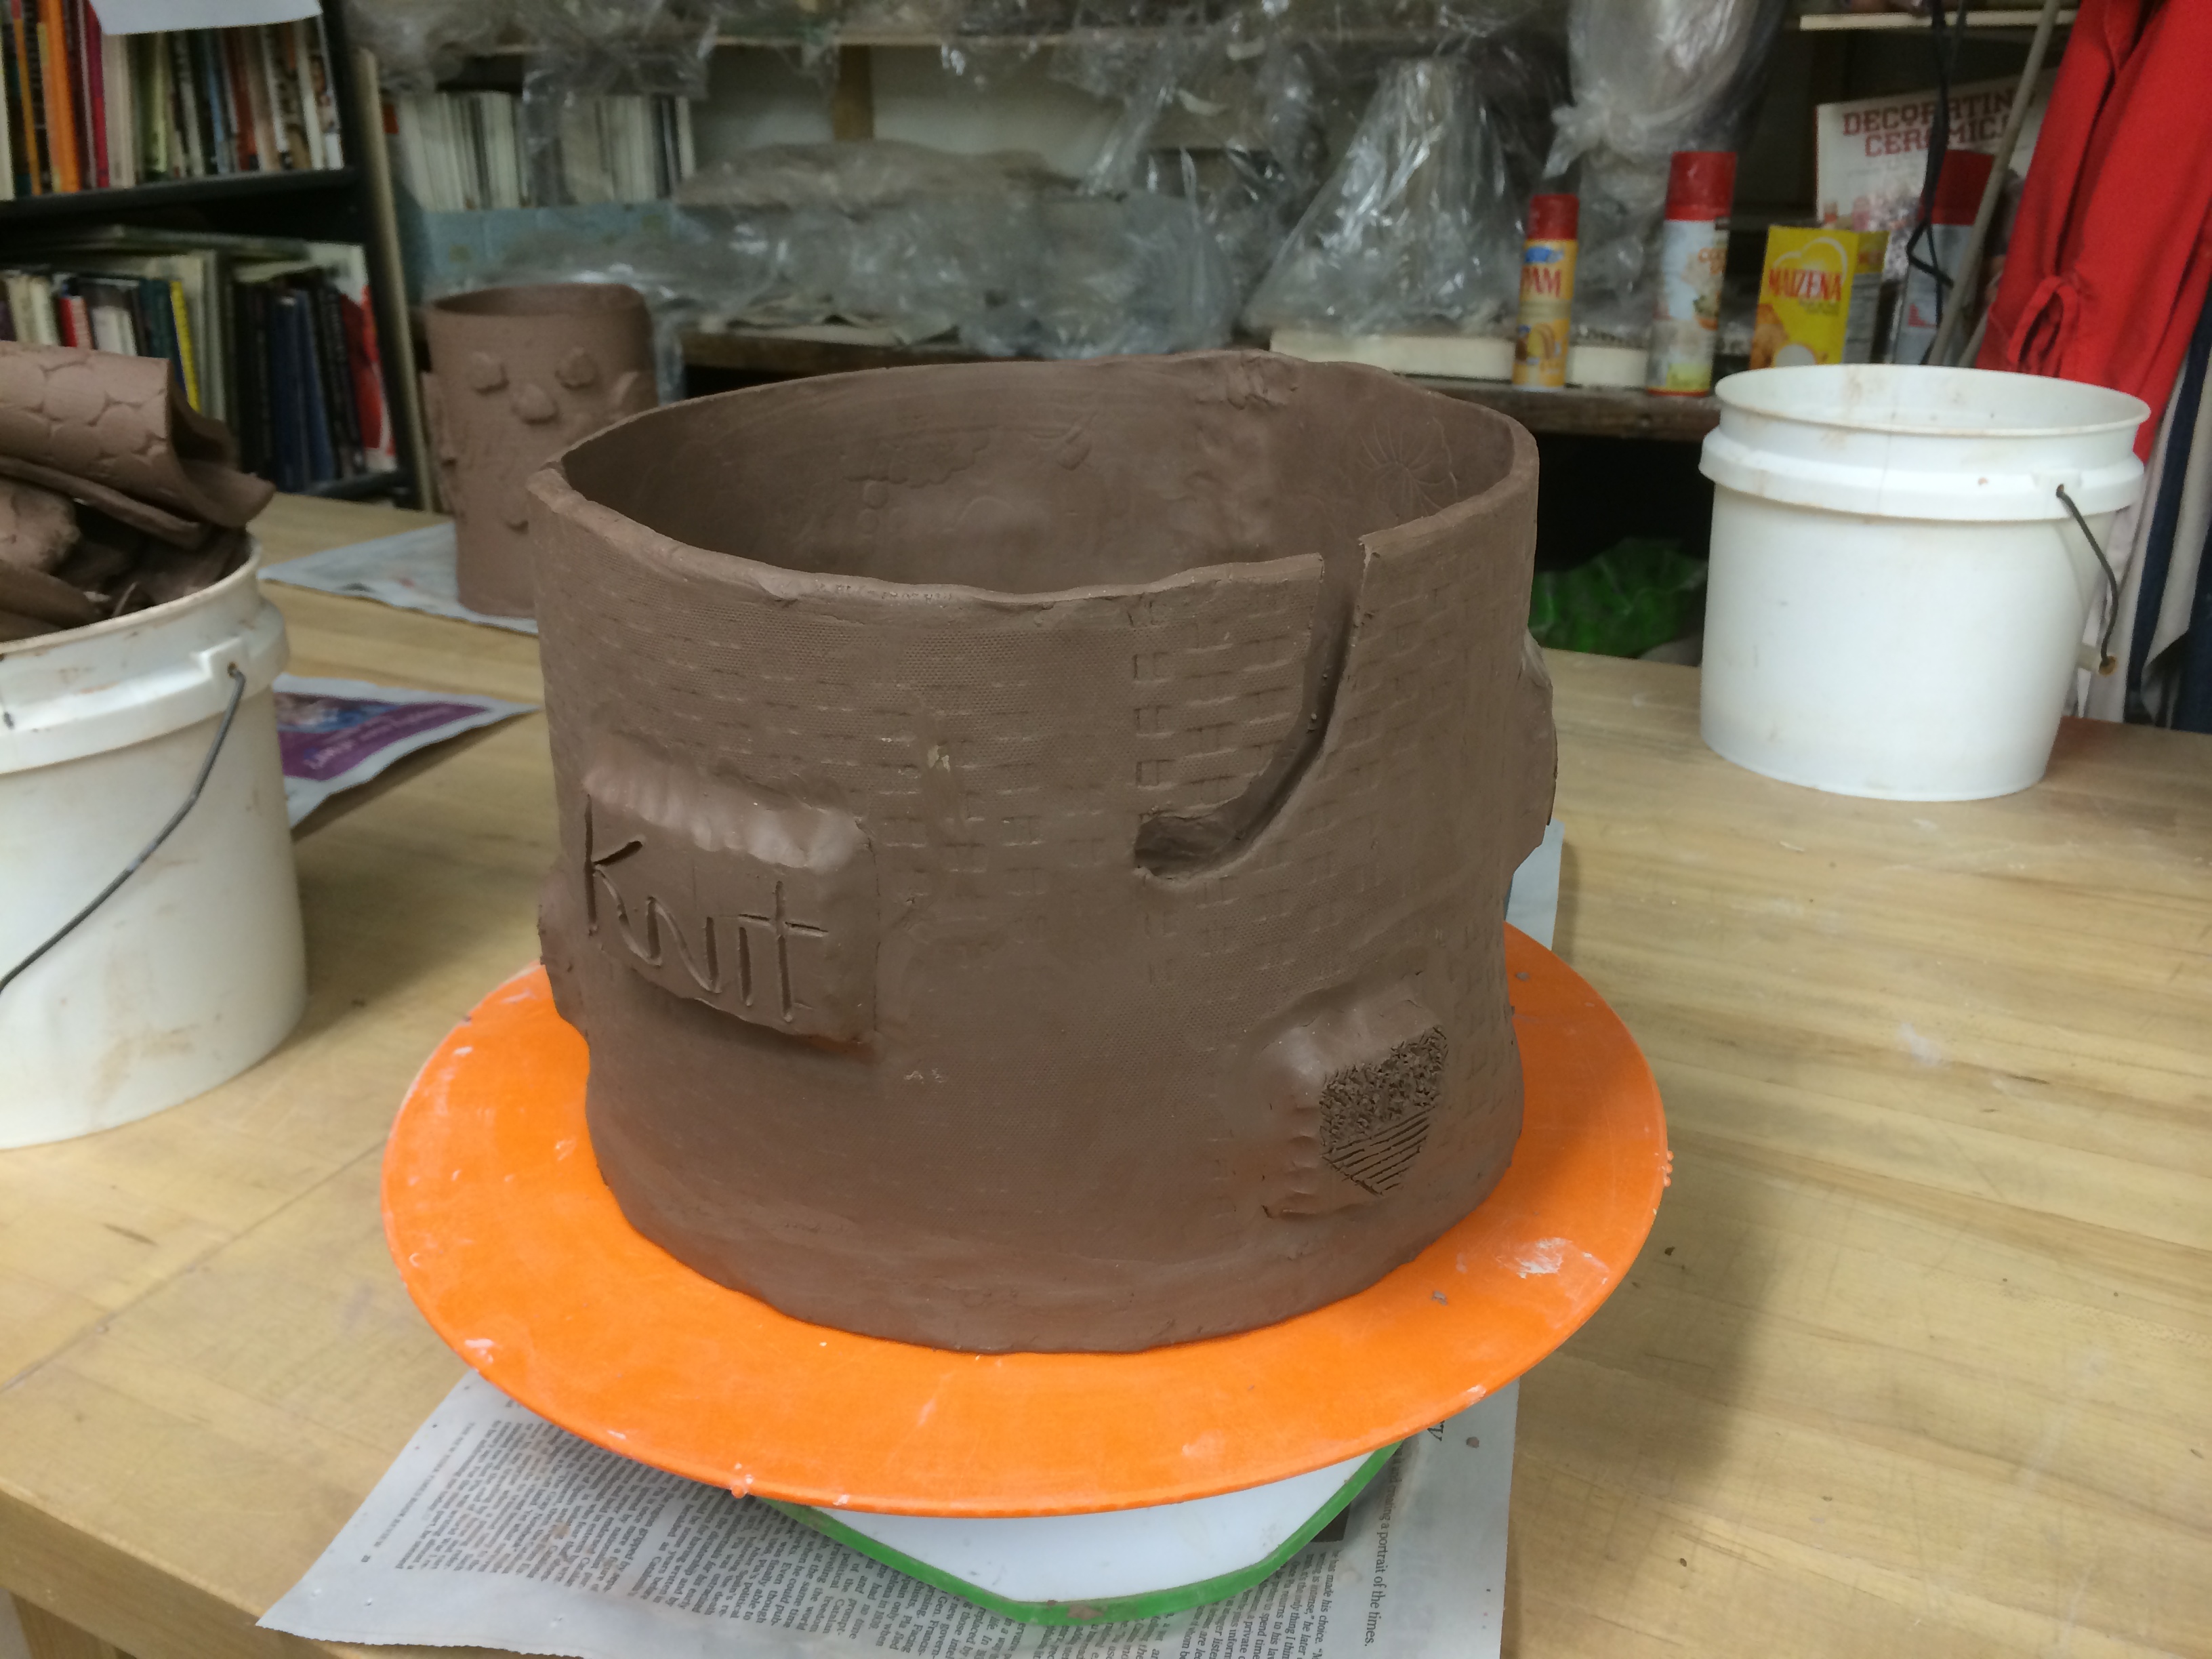
Lucky for me the class wasn’t full so there were extra slabs of clay to work with. Most yarn bowls I see on the market will hold small to medium size skeins of yarn. I wanted something that would hold one of those really huge skeins which I haven’t found anywhere. For that size, I needed an extra 1/2 slab of clay, which I cut and attached here. Originally I wanted a floral design on the outside but the imprint didn’t turn out well, so I went with this wicker basket design on the background.

If you’ve ever baked any bread or pastries you’ll find those skills useful here. The piece was so huge when I seamed the edges together, the instructor had to roll out a new piece of clay for the bottom. I used a lazy susan to spin my piece around while sealing the sides & bottom together and then adding other decorations.
There was a letter & number stencil I tried using to carve out letters which didn’t work out. I went with slabs of clay with handwritten words “yarn” “knit” and “purl” and some hand drawn motifs of knitting needles and a basket of yarn to decorate.
The final step was carving out the sections for threading the yarn through. I’ve never had a yarn bowl and I wasn’t sure how deep to carve the openings, plus I was concerned about the bowl falling apart. I may or may not have carved the opening deep enough.


Compared to the wheel throwing class I had, I’m proud of my result & I get to keep what I make this time. For a $15 fee, this masterpiece will be fired in their kilns and glazed with whatever color they happen to have in their stash at the time, we don’t get to choose. The end result will be smaller than what you see here due to the clay drying. Crossing my fingers for the next 6 weeks hoping the piece doesn’t crack.


Apr 21, 2014 @ 09:07:59
Awesome!